3D PermaStickers™ Application Instructions
1. Prep Your Surface and Pre-Squeegee Your Permasticker
Prepping the Area - When necessary, clean the surface of your item before applying the PermaSticker using either soap (like Dawn dishwashing soap works well) & water or a mixture of rubbing alcohol and water (50/50 mix). The cleaner the surface, the longer it will endure natural elements, washing, and wear and tear. Although it will adhere without this, it is recommended. Make sure you completely dry the area.
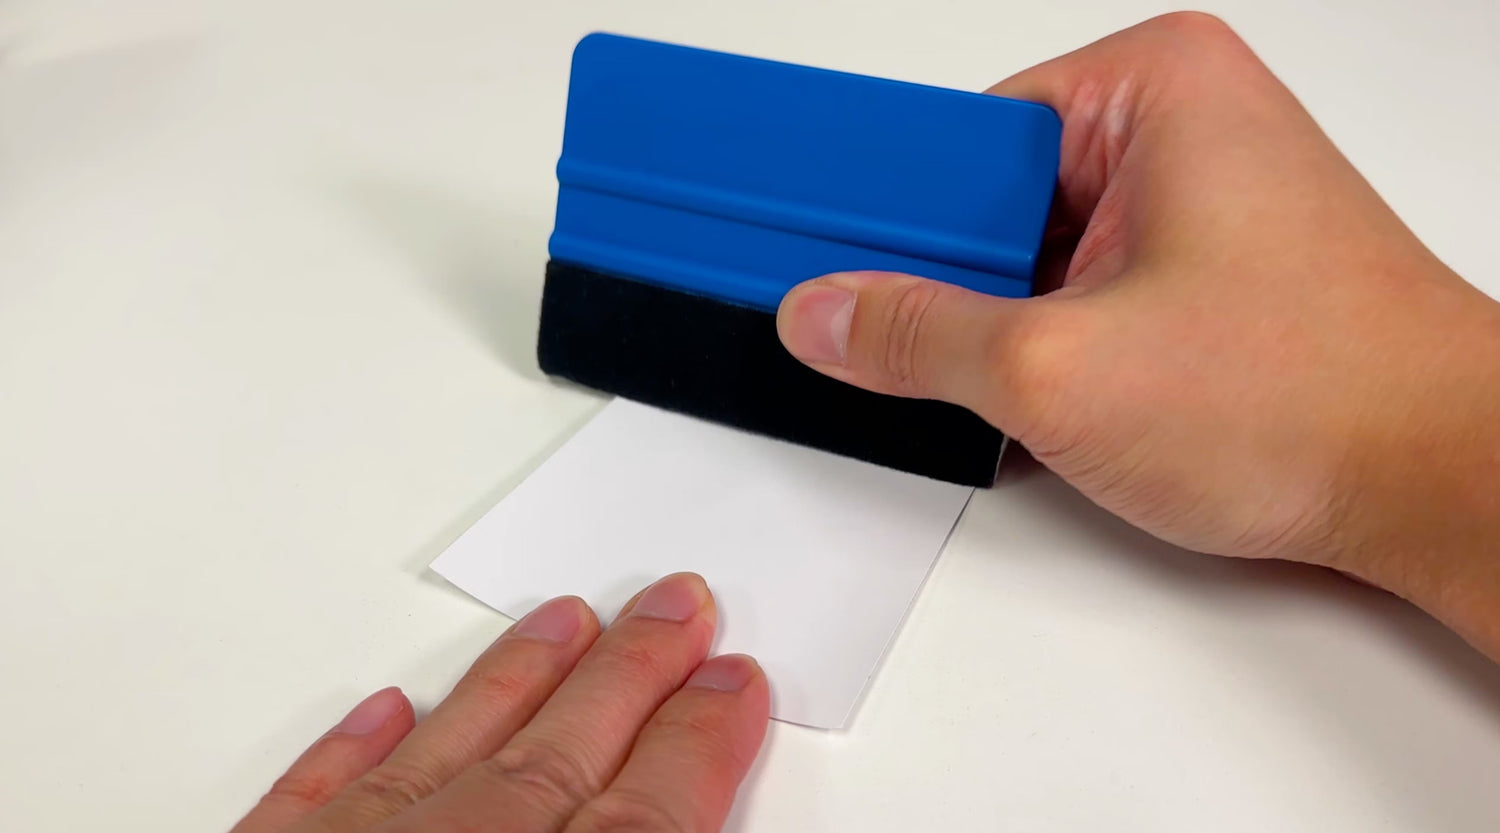
Pre-Squeegee - place the design face down. Using an old credit card, run over the whole design with hard pressure, back and forth 2-4 times. Additional pressure and repetitions should be applied on thin and separated design elements, such as small text. We recommend a padded application squeegee like this one.
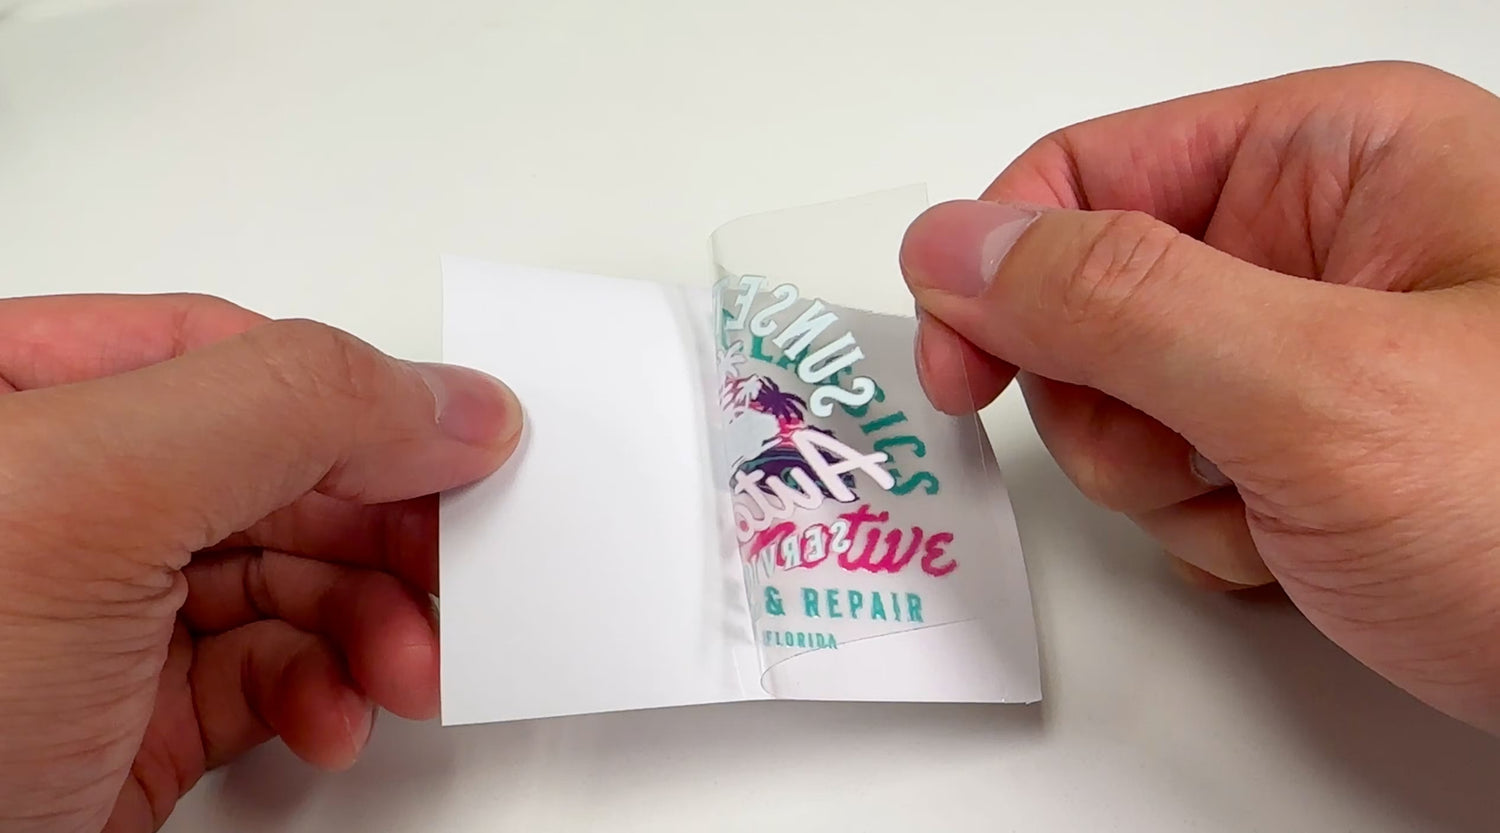
2. Separating The Clear Carrier Sheet From the Backing
To detach the clear carrier sheet from the backing, make a small tear away from the design. Gently peel the clear carrier sheet, watching to ensure the whole design lifts off the backing. We have a saying in the Dojo - Don’t peel with your hands, peel with your EYES. Designs which contain thin lines and small separated elements, such as small text, the slower you should peel. If parts don't lift, re-squeegee, and attempt to peel again from a different angle.
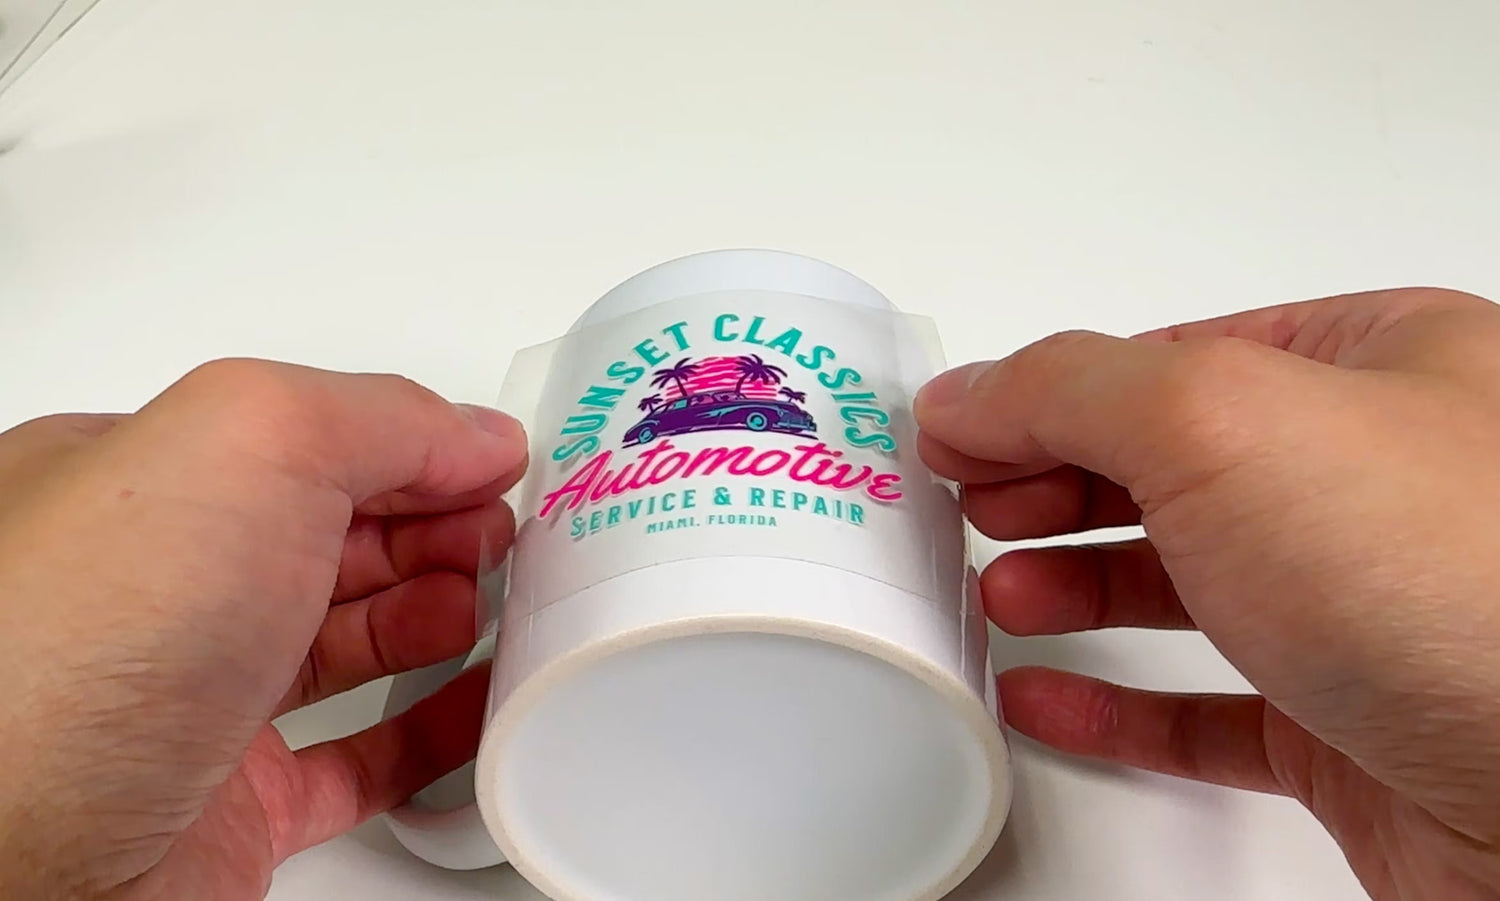
3. Placing Your UVPermaSticker Onto Your Item
First, identify the placement area on your item.
For smaller designs (4 inches & under), carefully place the design onto the placement area with two hands controlling the placement.
For larger designs (over 4 inches) youmay find it easier to place the sticker starting from one side and ending at the other. This will help control your placement, reduce bubbles underneath the design, and avoid wrinkling of the carrier sheet which could cause design elements being offset and/or design overlapping.
Pro Tip: Leave a corner of the carrier sheet unpressed to the product for easy peeling.
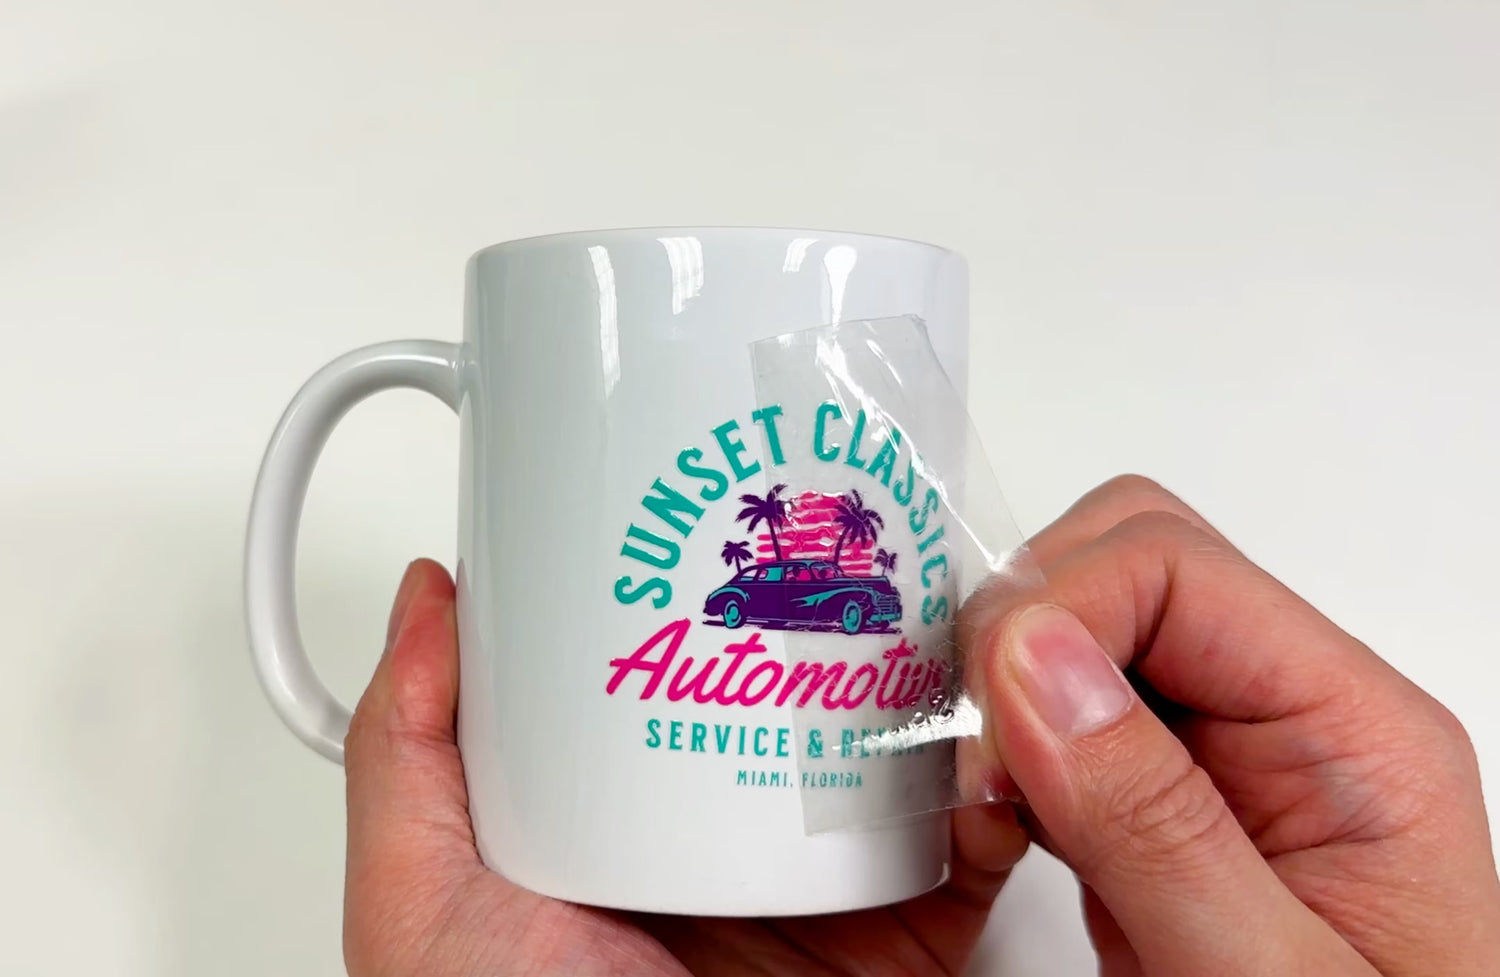
4. Completing the Transfer Process
After placing the design, firmly squeegee it 2-4 times. Peel slowly, watching to ensure all elements stick. Again, the lesson from the Dojo applies here - use your EYES and not just your hands. If any part of the design is not adhering, lay the carrier sheet back down, re-squeegee and try peeling from a different angle.
NOW GO IMPRESS & OFFEND SOMEONE!!!